先日公開した新テーマ「Owned Media」、ご覧いただけましたでしょうか?
管理画面からバナーやメルマガ登録フォームへとばすモーダルの設定ができるなど、オウンドメディアサイトとして必要な要素を揃えたテーマです。追加されたプッシュ通知機能を組み合わせて、更新しやすいサイトを目指しましょう!
ここでは「Owned Media」のカスタムフィールドに用意されたメルマガ登録フォームURLのおすすめ使用法を順序立ててご紹介していきます!
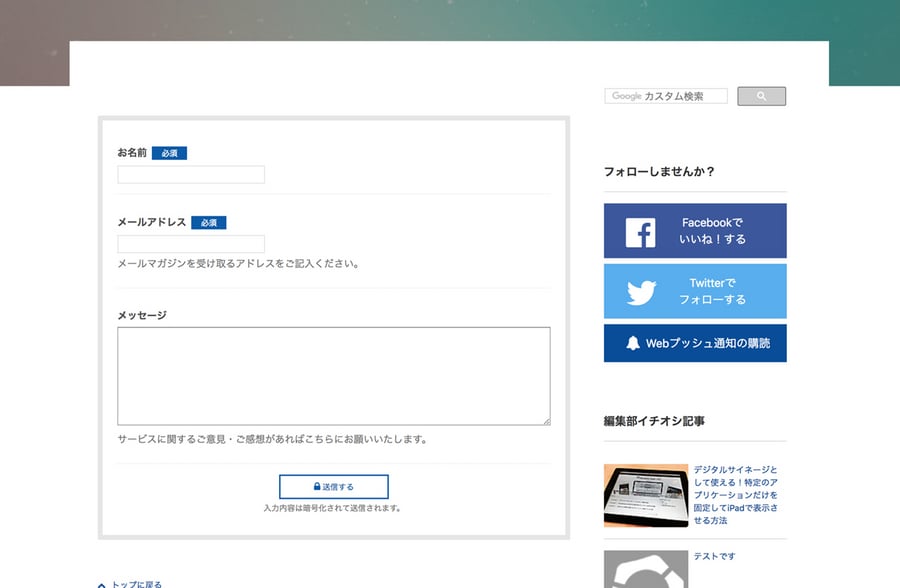
「Owned Media」でメルマガ登録モーダルを設置する流れ
フォームを作る
まずは、フォームを作成していきます。
サイトの編集画面から、フォーム>新規>基本設定に移り、必要事項を入力します。
終わったら、項目変更タブに移動し、必要な項目を用意していきます。
メルマガ登録に使用するフォームなので、シンプルに「お名前」「メールアドレス」「コメント欄」があれば良いでしょうか。「お名前」と「メールアドレス」は必須項目としておきましょう。
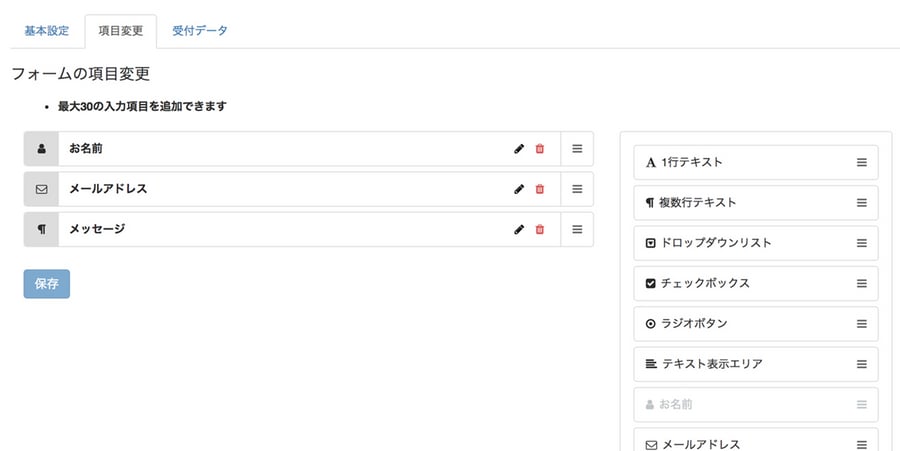
■フォーム作成についての記事は活用ブログでも詳しくご紹介しています。
フォームのデザインをCSSで指定する
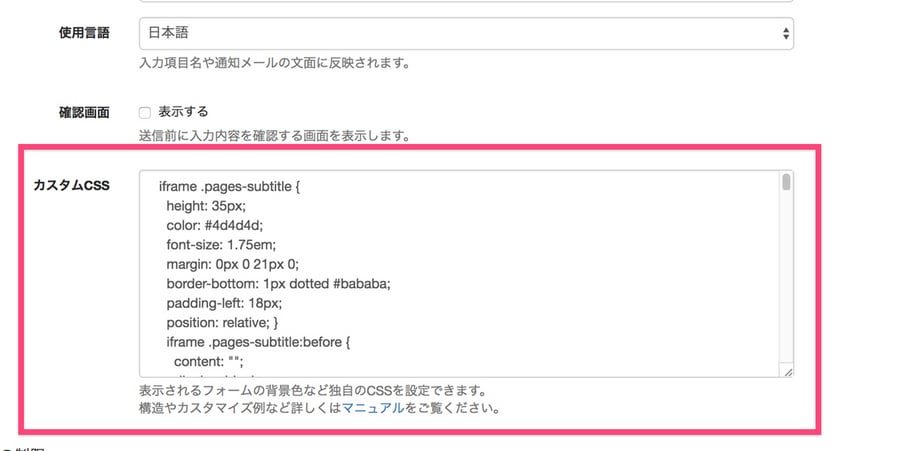
フォームのCSSはフォームの設定画面、「カスタムCSS」のフィールドから記述します。
デフォルトのデザインにあったCSSを用意しましたので、コピー&ペーストで適応してみましょう。
  iframe .pages-subtitle {
  height: 35px;
  color: #4d4d4d;
  font-size: 1.75em;
  margin: 0px 0 21px 0;
  border-bottom: 1px dotted #bababa;
  padding-left: 18px;
  position: relative; }
  iframe .pages-subtitle:before {
    content: "";
    display: block;
    width: 7px;
    height: 35px;
    background-color: #33336a;
    position: absolute;
    left: 0px; }
  @media (min-width: 768px) {
    iframe .pages-subtitle {
      height: 42px;
      font-size: 2em;
      margin: 0px 0 2rem 0;
      padding-bottom: 1rem; }
      iframe .pages-subtitle:before {
        width: 10px;
        height: 42px; } }

iframe {
border: 7px solid #e6e6e6;
padding: 21px; }

.container {
border: 7px solid #e6e6e6;
padding: 21px;
max-width: 100%;
margin-top: 42px;
width: 100%; }

.form-column:after {
content: " ";
display: block;
clear: both; }

.label {
padding: .2em 0em .3em;
font-size: 1em;
font-weight: 700;
line-height: 1;
color: #4d4d4d;
white-space: nowrap;
vertical-align: baseline;
width: 100%;
float: left;
display: inline-block;
border-radius: 0px;
text-align: left; }

.badge {
font-size: 80%;
padding: 3px 14px;
margin-left: 7px;
font-weight: normal;
background-color: #0059AB;
color: #ffffff;
border-radius: 0px;
line-height: normal;
box-sizing: border-box; }
.badge.badge-optional {
  display: none; }

.form-column {
position: relative;
border-bottom: 1px dotted #e6e6e6;
padding: 14px 0; }

input, textarea {
width: 100%;
display: inline-block;
float: none; }

textarea {
height: 140px; }

.input-group{
  position: relative;
  display: table;
}

.input-group label {
margin-right: 14px; }

.input-group label:last-child {
margin-right: 0px; }

.input-group input {
width: auto;
margin-right: 7px; }

.form-column-zip-code-jp .input-group input, .form-column-zip-code-jp .input-group .separator-zip-code-jp {
float: left;
margin-right: 7px; }

.form-column-file input {
border: 0px; }

.button-group {
text-align: center;
margin-top: 14px; }
.button-group .button {
  background-color: rgba(255, 255, 255, 0.3);
  -webkit-transition: background-color 0.5s, color 0.5s;
  transition: background-color 0.5s, color 0.5s;
  background: none;
  border: 2px solid #ffffff;
  border-radius: 0px;
  font-size: 0.8em;
  padding: 8px 48px;
  color: #ffffff;
  text-decoration: none;
  border: 2px solid #0059AB;
  border-radius: 0px;
  color: #0059AB; }
  .button-group .button:hover, .button-group .button:active, .button-group .button:focus {
    border: 2px solid #ffffff;
    color: #0059AB;
    background-color: rgba(255, 255, 255, 0.9);
    opacity: 1; }
  .button-group .button .glyphicon {
    margin-right: 3px; }
  .button-group .button:hover {
    color: #ffffff;
    border: 2px solid #0059AB;
    background-color: #0059AB;
    opacity: 1; }
  .button-group .button .icon {
    font-size: 14px;
    margin-right: 3px; }
.button-group .help-block {
  font-size: 80%; }

/*over768px*/
@media (min-width: 768px) {
iframe {
  padding: 42px; }
.label {
  padding: .2em .6em .3em;
  width: 30%;
  float: left; }
input, textarea {
  width: 70%; }
.button-group {
  text-align: center;
  margin-top: 28px; } }
フォームをウェブページに設置する
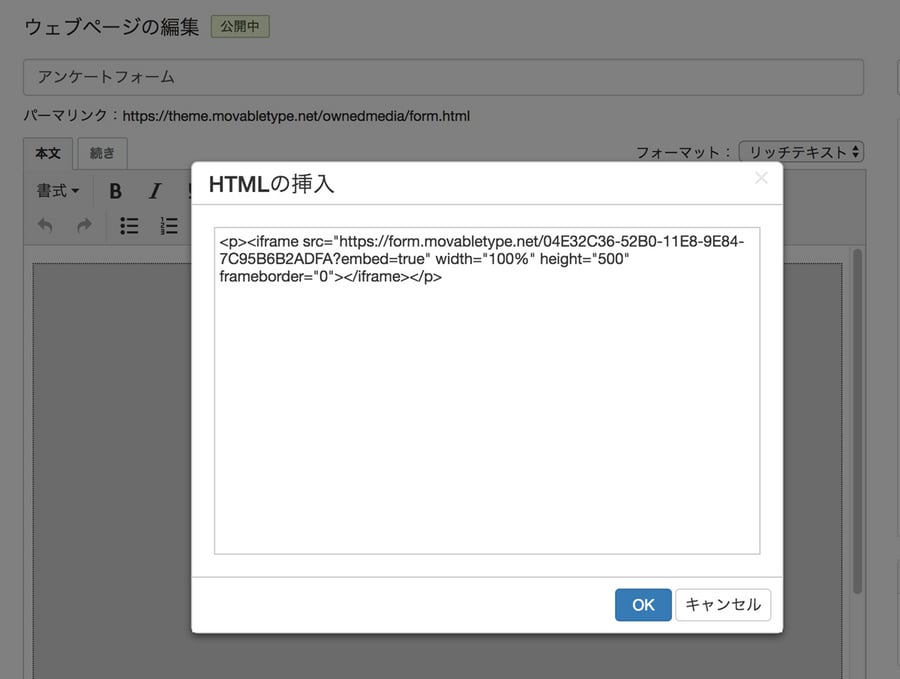
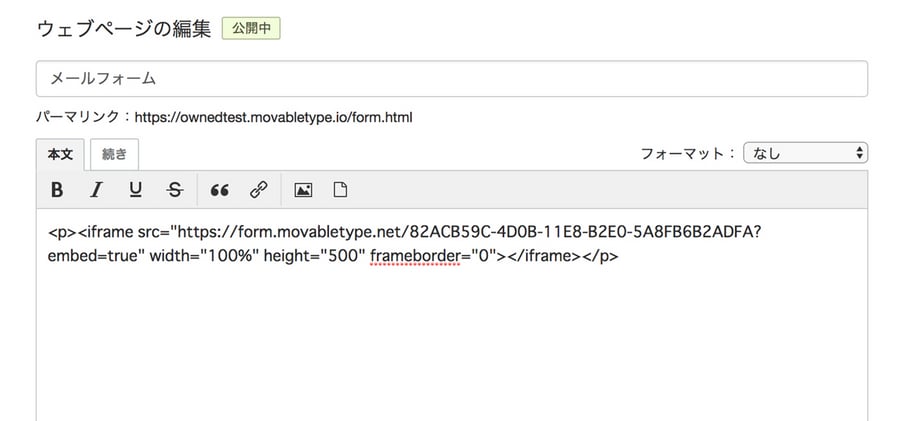
基本設定の埋め込みコードをコピーします。

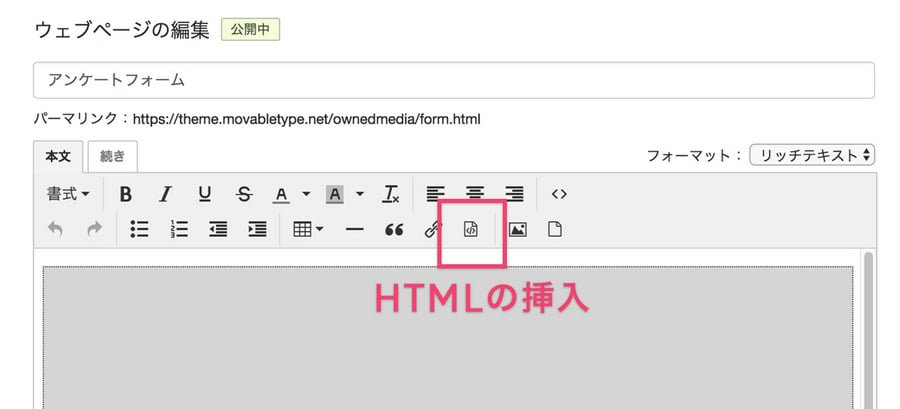
ウェブページ>新規から新規ウェブページを作成し、本文にペーストします。これで、ウェブページにフォームが設置できました。
[フォーマット:リッチテキストの場合]
[フォーマット:なしの場合]
このページへのリンクをモーダルからつなぎます。モーダル以外からも導線が欲しい場合は、ウェブページのカスタムフィールド「ナビに表示させる」にチェックを入れたり、バナーからリンクを繋げてもよいでしょう。
メルマガ登録フォームURLを設定
いよいよフォームURLを設定してみます!
まず、先ほど作ったウェブページの絶対URLをコピーしておきます。
続いて、設定>全般からメルマガ登録フォームURLのフォームに、ペーストします。
ページ右下にモーダルが表示されるようになりました!
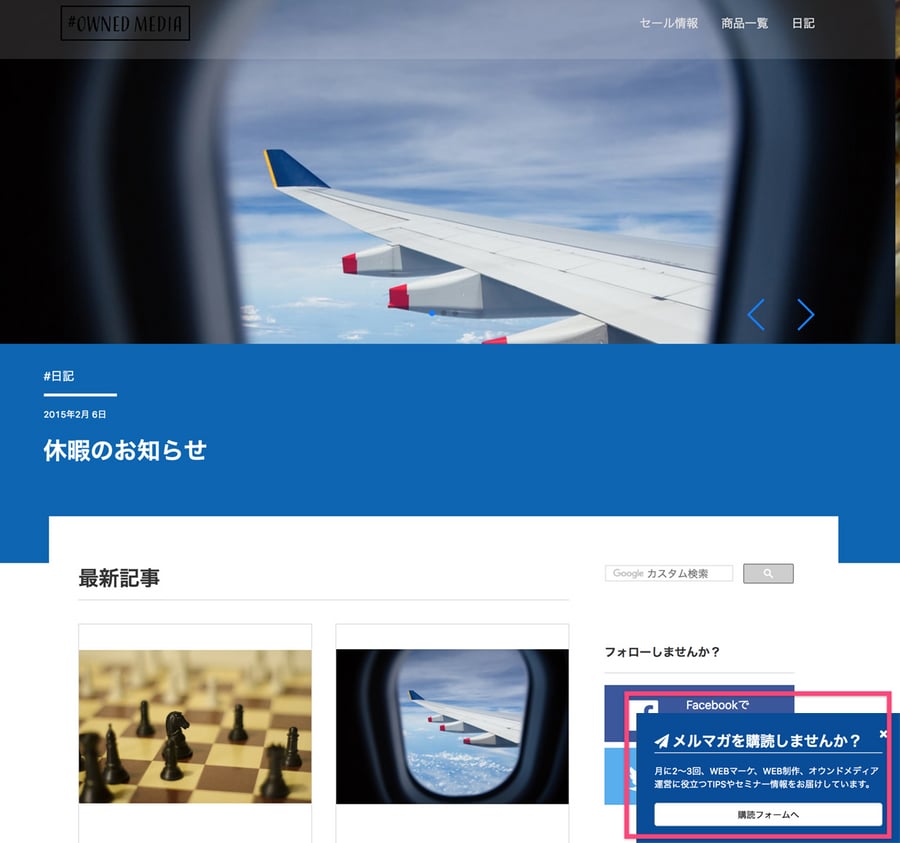
ボタンを押すとフォームへ遷移します。
これで完成です。
管理画面に用意されたものを活用して、効率的な運用をめざしましょう!では、よいテーマカスタマイズを♪
